Hi Everyone
Today’s post is a continuation of of my “How to make Dungeon Tiles” series. For part one in this series. explaining how to make your master, please follow the link above. For the second post explaining how to make the mold, please click here!
So, up to now you’ve gotten as far as having your mold. Then you’ve been patiently waiting for me to pull my finger out (I know I’m sorry!)… well, it’s out and we’re on!
Hopefully you’ve got those laser cut MDF tiles that I spoke about in the first post, because we’re going to be using them here.
In total, you need:
- Your mold(s)
- Laser cut MDF tiles
- Green Stuff
- Water
- Fingers and Thumbs
- Hobby Knife (Be careful kids!)
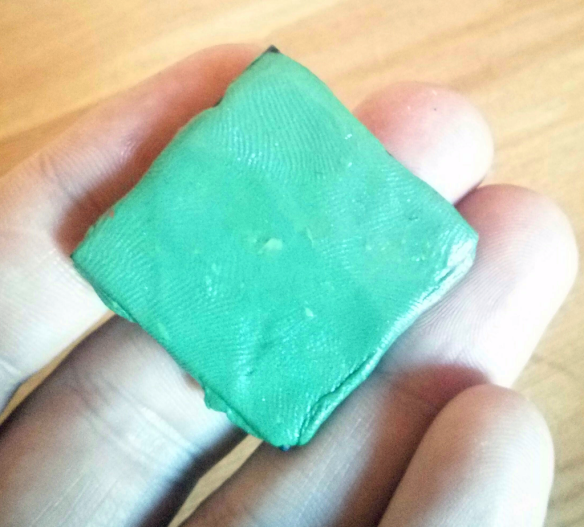
Here’s my last MDF tile rescued from the trash, its splodged with paint and has two holes in it. This is not how yours will look, yours will be pristine. I’ve also got a blob of green stuff ready to go – my finger is there for scale – Seriously, that’s about as much greenstuff as you need for one tile.

Bask in the glory of my finger
Make sure that blob of green stuff has been dunked in your water so it’s nicely wet, otherwise it will be too sticky to work with. Then splat the green stuff into the centre of your tile, and start spreading it out with your thumbs.

“Splat”

“Smidge”
You’ll want to make sure than the entire tile is covered, like this:
Covered tile
If you used the correct amount of green stuff, you should have a thin layer on your tile. Too much and you’ll have some serious overhang (Which you can trim with a wet hobby knife to use on your next tile) or too little, in which case you’ll need more green stuff on there!
When you’re happy, wet your mold (or it’ll stick!) then splat the entire tile into your mold and push down all over with firm pressure.

“Squish”
Then immediately push down from the top of your mold to pop the tile out.
Hopefully, if you’ve done it right it’ll look like this:

Like a butterfly from a cocoon
At this point you’ll want to put your fresh tile over to one side to cure for 24 hours and do your next one!
After a day, your tiles will be cured and safe to handle. Marvel at your craftsmanship. Waaauw. Go Team.
Now, you might notice some overhang on your tiles, where green stuff has blobbed over the edge of the MDF. If this is the case, just run your hobby knife along the edge of the tile to clean them up. No need for it to be wet now either, that green stuff’s sticky days are over.
Hopefully, with that done, you’ll end up with a healthy looking batch like this:
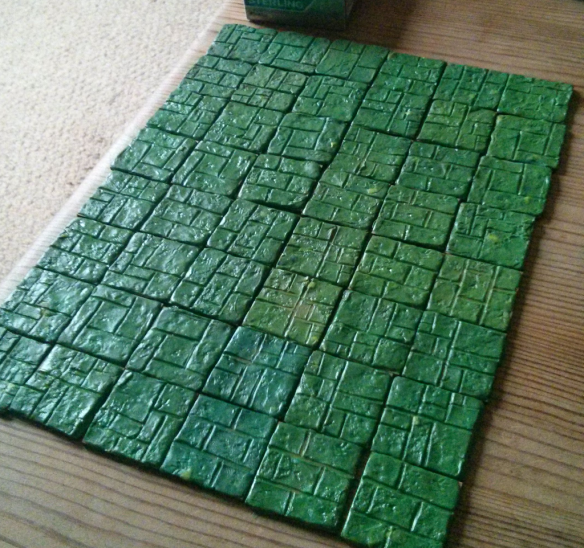
Glorious
You can go right on ahead now and paint them if you like. Or, you could wait until next time when I show you how I painted mine…
As ever, thanks for reading. Please drop me a comment below the line and visit my facebook from the link below.
Thanks
Jimmi

Good stuff.
LikeLiked by 1 person
They look great, instant mould is really useful stuff if you’re clever about using it like this! One thing though, as the tiles are only MDF and a thin layer of Green Stuff are they weighty enough not to separate and spread about when in play with miniatures on them?
LikeLike
Yeah I’ve not had any issues with them, I find they stick together ok 🙂
I guess with some real tussle they could come lose, but then I’d superglue it to repair it 🙂
LikeLiked by 1 person
Ah! I assumed that you kept them as individual tiles to build a floor plan rather than gluing them together into pre-sized ‘rooms/corridors’ etc. From a time perspective that makes much more sense too, ‘hang on guys, let me build this 20 x 20 square great hall…’
LikeLike
Nah you were right the first time, did you mean the tiles separate from one another?
Lol, crossed wires! Yeah that can happen, but I’ve got a couple of solutions lined up. My favourite is to magnetise the back of the tiles and lay them on a metal sheet 🙂
LikeLiked by 1 person
Yes separation was what I meant but I didn’t explain myself very well, sorry! You’re already one step ahead with the magnetic idea should it cause problems – neat idea!
LikeLike
Pingback: How to make dungeon tiles for D&D, Dungeon Saga, and Dungeons of Orkney – Part 4) Painting the Tiles | Jimmi Waz 'Ere
Pingback: How to make dungeon tiles for D&D, Dungeons of Orkney and Dungeon Saga – Part 2) The Mold | Jimmi Waz 'Ere